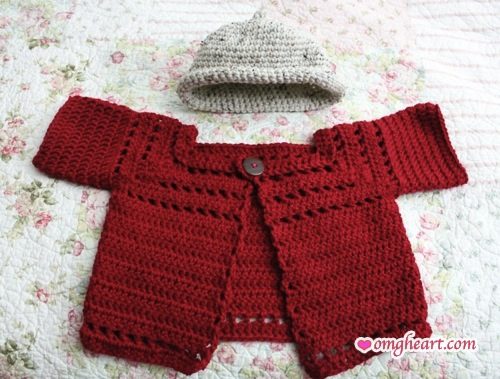
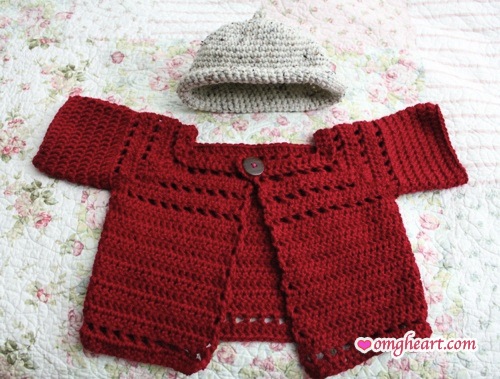
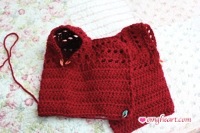
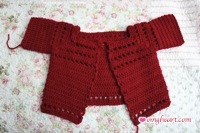
I made this little play jacket for my good friend Shahina’s baby who lives in Denmark. Yay! Something to keep baby warm in the cold Danish winter. I again needed a quick and easy pattern so here’s what I came up with. It’s a pattern from Caron Yarns that I adapted. It took me about 5-6 hours including sewing on the button and weaving in ends. A bonus is it’s completely machine washable and dryable. It’s durable and easy to keep clean. So baby can go nuts with the playing while still looking good. 🙂 And not have to worry about ruining anything! Here is the Baby Hat pattern.
Materials:
1 Ball Red Heart Soft Yarn, 100% Acrylic, Worsted Weight, Wine #4608, 256 yards, $4.69
1 Button + Embroidery Floss + Tapestry Needle (optional)
Stitch Markers
Crochet Hook: Size H8 [5.00mm]
Measurements:
Collar: 6 inches across
Yoke: 11 inches across (including top of shoulders)
Body: 6.5 inches Long, 12 inches Wide
Sleeves: 5 inches Long, 4.25 inches Wide
Collar to Hem: 9.5 inches Long
Special Stitches:
DC: Double Crochet
Eyelet Stitch: [chain 1, skip 1, dc]
Skill Level: Beginner
Pattern:
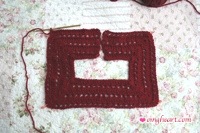
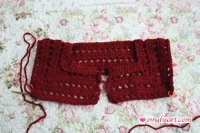
Yoke:
Begin with the yoke.
Loosely chain 61
Row 1: Dc in fourth ch from hook (counts as dc), dc in next 8 sts, 5 dc in next st, place marker in center st, dc in next 7 sts, 5 dc in next st, pm in center st, dc in next 21 sts, 5 dc in next st, pm in center st, dc in next 7 sts, 5 dc in next chain, pm in center st, dc in last 10 sts, turn. Total 75 stitches.
Row 2: Working in back loop only. Ch 3 (counts as dc), dc in next st, *[ Eyelet Stitch 5 times, 5 dc in next (marked) st, dc ]*, repeat *[ … ]* once, Eyelet Stitch 12 times, 5 dc in next st, dc, repeat *[ … ]* once, Eyelet Stitch 5 times, dc in last st; turn. Total 91 stitches.
Row 3: Ch 3, dc in next 13 sts, 5 dc in next st, dc in next 15 sts, 5 dc in next st, dc in next 29 sts, 5 dc in next st, dc in next 15 sts, 5 dc in next st, dc in last 14 sts; turn. Total 107 stitches.
Row 4: Ch 3, dc in next st, Eyelet Stitch 7 times; 5 dc in next st, dc; Eyelet Stitch 9 times; 5 dc in next st, dc; Eyelet Stitch 16 times; 5 dc in next st, dc; Eyelet Stitch 9 times; 5 dc in next st, dc; Eyelet Stitch 7 times, dc in last st; turn. Total 123 stitches.
Row 5: Ch 3, *[ dc in each st across to marked st; 5 dc in marked st ]*, repeat *[ … ]* 4 times, dc in each st until end; turn. Total 139 stitches.
Row 6: Ch 3, dc in next st, *[ Eyelet Stitch until marked st, dc in next st, 5 dc in marked st ]*, repeat *[ … ]* 4 times, Eyelet Stitch to last st, dc in last st; turn. Total 155 stitches.
Body:
Row 1: Working in back loop only. Ch 3 (counts as dc), dc in next 21 sts; skip 33 sts; dc in next 45sts; skip 33 sts; dc in last 22 sts; turn. Total 89 stitches.
Row 2-10: Ch 3, dc until end of round; turn.
Row 11: Ch 3, dc, Eyelet Stitch until 2 sts left, dc in last 2 sts. turn.
Row 12: Ch 3, dc until end of round; Fasten off.
Sleeves:
Join yarn through the first and last skipped stitches to join armhole.
Row 1: Working in back loop only. Ch 3, dc until end of around, slip st in top of beginning ch-3 to join;
Row 2-7: Ch 3, dc until end of around, slip st in top of beginning ch-3 to join. Fasten off.
Finish:
Sew button on to top corner of collar. No need to crochet a button loop on the opposite side. Use eyelet hole in opposite side as a button loop hole.
Weave in ends.
Notes:
I made a few modifications to the original pattern by Caron Yarns. It made it a one skein sweater and a very quick crochet! I added a few rows to the body to make it longer and an eyelet row at the bottom of the sweater. I also did not do any edging or finishing to the sweater. The edges are raw.
Buttons! – I save all my buttons from my clothing. Many times jackets, sweaters etc will come with an extra button sewn in. I save those for future projects since I never end up using them to replace missing or broken buttons!
If you do not like the button, try a crochet flower instead so there is no hardware on the piece. Or try 2 pompoms – either create a tie at the collar with pompoms for tassels or connect 2 pompoms to a long crochet chain and weave through the first row of eyelets in the collar. This is extra versatile since you can then use the pompoms as a cinch tie giving you an adjustable collar.
Applique – Personalize it with a simple shape like heart or a duckling! And simply stitch on with embroidery floss and a tapestry needle. I wanted to do this but did not have time. Perhaps next time!
For additional sizes, see Caron Yarns original pattern. The original pattern is a hoodie jacket. It also comes with a baby hat pattern.


Kim
Thanks for the inspiration! I like your version better than the original.
Alice
Hi Kimberly,
Thanks for the lovely note! I hope I dressed it up a bit. 🙂 An extra bonus for me was that it turned out to be a one skein project too. Can’t go wrong with that! Hope you have a wonderful holiday and a happy new year!! Knit Sew Crochet Forever!
OMG! Heart » Pattern: Baby Hat
[…] I made this to go with the Baby Cardigan I made for my friend’s new baby! Quick and simple hat that is cute and versatile. Probably […]
Monali
Hi.I love your pattern 🙂 I was searching to make a mini cardigan for my “winnie the pooh” amigurumi,and i stumbled across your blog.I have used your pattern,slightly modified it to a mini size.you can see it in my blog- http://deltazelta.blogspot.in/2012/06/my-winnie-pooh-amigurumi.html thanks a lot for providing the pattern for free and the easy tutorial.
Alice
Dear Monali,
OMG! That. Is. SO. CUTE.!! Love your Winnie the Pooh lol. He came out totally awesome! And the “mini-fied” cardigan looks fabulous!!
How clever is that to modify the cardigan for a doll-size?!
Thanks so much for sharing. And Happy Crocheting!
–Alice
Bethany
Thanks for the pattern! I altered it further by shortening the sleeves and body to make it a short sleeved crop cardigan to go over an infant sleeveless church dress. Turned out super cute–thanks for posting your alterations–so helpful!
Alice
Hi Bethany!
Awesome! That’s a great idea and it sounds super cute. I wished I could check it out 🙂 If you have pics you’d like to post, please do!! It’s a great little cardi pattern. And very quick too.
–Alice
MICHELE JOHNSON
DO YOU HAVE THIS EXACT PATTERN IN ADULT SIZES AS WELL?
TY
Alice
Hi Michele, No, I don’t sorry!